配置Bean一共有三种方式
基于XML文件配置 基于注解配置 基于Java类配置
不管是哪种配置,都是表达Bean定义的载体,其实本质都是为Spring容器提供Bean定义的信息。它们允许多项组合。
1.基于XML文件配置 下面基于XML配置文件定义了三个简单的Bean
1
2
3
4
5
6
7
8
<?xml version="1.0" encoding="UTF-8"?> <beans xmlns ="http://www.springframework.org/schema/beans" xmlns:xsi ="http://www.w3.org/2001/XMLSchema-instance" xsi:schemaLocation ="http://www.springframework.org/schema/beans http://www.springframework.org/schema/beans/spring-beans.xsd" > <bean id ="cat" class ="com.smart.model.Cat" /> <bean id ="dog" class ="com.smart.model.Dog" /> <bean id ="people" class ="com.smart.model.People" /> </beans >
这段信息提供了实例化Cat、Dog、People这三个Bean的必需信息,IoC容器完全可以根据此创建这三个Bean的实例。
测试
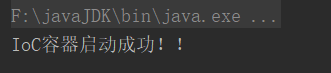
1
2
3
4
5
6
7
8
9
10
11
public class test4 public static void main (String[] args) ApplicationContext ct=new ClassPathXmlApplicationContext("beans/beans.xml" ); Cat c=ct.getBean("cat" ,Cat.class); Dog d=ct.getBean("dog" ,Dog.class); People p=ct.getBean("people" ,People.class); if (c!=null &&d!=null &&p!=null ){ System.out.println("IoC容器启动成功!!" ); } } }
输出:
配置文件中不允许出来id相同的Bean,但可以出现相同name的Bean,如果有多个相同name的Bean,则返回最后声明的Bean,因为后面声明的Bean将前面的覆盖了。
2.基于注解的配置 下面使用注解定义Bean
peopleBean
声明一个id=people1的Bean,Spring通过@Autowired注解实现Bean的依赖注入,@Autowried的required属性表示当在容器里找不到匹配的Bean时也不会抛出异常(默认为true,找不到会抛出异常)。@Qualifier为指定注入Bean,如果容器有一个以上匹配的Bean,则可以通过@Qualifier注解限定Bean的名称。
1
2
3
4
5
6
7
8
9
10
11
12
13
14
15
16
17
18
19
20
21
22
23
24
25
26
27
28
29
30
31
32
33
34
35
36
37
38
import org.springframework.beans.factory.annotation.Autowired;import org.springframework.beans.factory.annotation.Qualifier;import org.springframework.stereotype.Component;@Component("people1") public class peopleBean private String name; private catBean cat; @Autowired @Qualifier("dog1") private dogBean dog; public catBean getCat () return cat; } @Autowired(required = false) public void setCat (catBean cat) this .cat = cat; } public String getName () return name; } public void setName (String name) this .name = name; } public dogBean getDog () return dog; } public void setDog (dogBean dog) this .dog = dog; } }
catBean
声明一个id=cat1的Bean
1
2
3
4
5
6
7
8
9
10
11
12
13
14
15
16
17
18
19
20
21
22
23
import org.springframework.stereotype.Component;@Component("cat1") public class catBean private String name; private int age; public String getName () return name; } public void setName (String name) this .name = name; } public int getAge () return age; } public void setAge (int age) this .age = age; } }
dogBean
声明一个id=dog1的Bean
1
2
3
4
5
6
7
8
9
10
11
12
13
14
15
16
17
18
19
20
21
22
23
import org.springframework.stereotype.Component;@Component("dog1") public class dogBean private String name; private int age; public String getName () return name; } public void setName (String name) this .name = name; } public int getAge () return age; } public void setAge (int age) this .age = age; } }
配置文件
使用context命名空间,它提供了通过扫描类包以应用注解定义Bean的方式。通过context命名空间的component-scan 的base-package 的属性指定一个需要扫描的基类包。
1
2
3
4
5
6
7
8
9
10
11
<?xml version="1.0" encoding="UTF-8"?> <beans xmlns ="http://www.springframework.org/schema/beans" xmlns:xsi ="http://www.w3.org/2001/XMLSchema-instance" xmlns:context ="http://www.springframework.org/schema/context" //声明命名空间 xsi:schemaLocation ="http://www.springframework.org/schema/beans http://www.springframework.org/schema/beans/spring-beans.xsd http://www.springframework.org/schema/context http://www.springframework.org/schema/context/spring-context.xsd" > <context:component-scan base-package ="com.smart.Beans" /> </beans >
如果仅希望扫描特定的类而并非基类包下的所有类,那么可以使用resource-pattern 属性过滤出特定的类。如:
1 <context:component-scan base-package ="com.smart" resource-pattern ="Beans/*.class" />
Spring仅会扫描基类包里Beans子包中的类。
测试类Test
1
2
3
4
5
6
7
8
9
10
11
12
13
14
15
16
17
import com.smart.Beans.peopleBean;import org.springframework.context.ApplicationContext;import org.springframework.context.support.ClassPathXmlApplicationContext;public class test4 public static void main (String[] args) ApplicationContext ct=new ClassPathXmlApplicationContext("beans/component.xml" ); peopleBean p=ct.getBean("people1" ,peopleBean.class); if (p!=null &&p.getDog()!=null &&p.getCat()!=null ){ System.out.println("IoC容器启动成功!!" ); p.setName("老GS" ); p.getCat().setName("小菊" ); p.getDog().setName("旺财" ); System.out.println(p.getName()+"的Cat叫" +p.getCat().getName()+",Dog叫" +p.getDog().getName()); } } }
结果:
除了@Component以外,Spring提供了如下3个功能基本和@Component等效的注解,它们分别用于对DAO、Service、及Web层的Controller进行注解,所以也称这些注解为Bean的衍型注解。
@Repository: 用于对DAO实现类进行标注 @Service: 用于对Service实现类进行标注 @Controller: 用于对Controller实现类进行标注
提供这3个特殊的注解是为了让注解类本身的用途清晰化,此外Spring也赋予它们一些特殊的功能。
3.基于Java类的配置 普通的POJO(简单Java对象)只要标注**@Configuration**注解,就可以为Spring容器提供Bean定义的信息了,每个标注了@Bean的类方法都相对于提供一个Bean的定义信息。
peopleConfig
在PeopleConfig类定义处标注@Configuration注解,说明这个类可用于为Spring提供Bean的定义信息。类的方法处可以标注@Bean注解,Bean的类型由方法返回值类型决定,名称默认和方法名相同。由于@ Configuartion注解类本身已经标注了@Component注解,所以任何标注了@Configuration的类,它们可以像普通的Bean一样被注入其他的Bean中。如下面将AnimalConfig注入其中。
1
2
3
4
5
6
7
8
9
10
11
12
13
14
15
16
17
18
19
20
import org.springframework.beans.factory.annotation.Autowired;import org.springframework.context.annotation.Bean;import org.springframework.context.annotation.Configuration;import org.springframework.context.annotation.Import;@Configuration @Import(AnimalConfig.class) public class PeopleConfig @Autowired private AnimalConfig animalConfig; @Bean public People getPeople () People people=new People(); people.setC(animalConfig.peopleCat()); people.setD(animalConfig.peopleDog()); return people; } }
AnimalConfig
定义AnimalConfig配置类。给第一个Bean命名为cat1。@Scope表示每次调用peopleDog都会返回一个新的Bean。
1
2
3
4
5
6
7
8
9
10
11
12
13
14
15
16
17
import org.springframework.context.annotation.Bean;import org.springframework.context.annotation.Configuration;import org.springframework.context.annotation.Scope;@Configuration public class AnimalConfig @Bean(name="cat1") public Cat peopleCat () return new Cat(); } @Scope("prototype") @Bean public Dog peopleDog () return new Dog(); } }
通过@Configuration类启动IoC容器
通过AnnotationConfigApplicationContext 类的构造函数直接传入标注@Configuration的Java类,直接用该类中提供的Bean定义信息启动IoC容器。
1
2
3
4
5
6
7
8
9
10
11
12
13
14
15
16
17
18
19
import com.smart.config.PeopleConfig;import org.springframework.context.ApplicationContext;import org.springframework.context.annotation.AnnotationConfigApplicationContext;public class test5 public static void main (String[] args) ApplicationContext ct= new AnnotationConfigApplicationContext(PeopleConfig.class); People p=ct.getBean(People.class); Cat c=ct.getBean("cat1" ,Cat.class); Dog d=ct.getBean("peopleDog" ,Dog.class); if (p!=null &&p.getD()!=null &&p.getC()!=null &&c!=null &&d!=null ){ System.out.println("基于Java类配置Bean,IoC容器启动成功!!" ); p.setName("老GS" ); p.getC().setName("小菊" ); p.getD().setName("旺财" ); System.out.println(p.getName()+"的Cat叫" +p.getC().getName()+",Dog叫" +p.getD().getName()); } } }
由于在PeopleConfig配置类中用@Import(AnimalConfig.class)将AnimalConfig配置类组装起来了,所以直接加载PeopleConfig.class就行了。如果没有组装需要如下操作:
1
2
3
4
5
6
AnnotationConfigApplicationContext ct= new AnnotationConfigApplicationContext(); ct.register(PeopleConfig.class); ct.register(AnimalConfig.class); ct.refresh();
结果:
通过XML配置文件引用@Configuration的配置 1 2 3 4 5 6 7 8 9 10 11 <?xml version="1.0" encoding="UTF-8"?> <beans xmlns ="http://www.springframework.org/schema/beans" xmlns:xsi ="http://www.w3.org/2001/XMLSchema-instance" xmlns:context ="http://www.springframework.org/schema/context" xsi:schemaLocation ="http://www.springframework.org/schema/beans http://www.springframework.org/schema/beans/spring-beans.xsd http://www.springframework.org/schema/context http://www.springframework.org/schema/context/spring-context.xsd" > <context:component-scan base-package ="com.smart.config" resource-pattern ="PeopleConfig" /> </beans >
通过@Configuration配置类引用XML配置信息 如下面xml中定义了三个Bean。
1 2 3 4 5 6 7 8 9 <?xml version="1.0" encoding="UTF-8"?> <beans xmlns ="http://www.springframework.org/schema/beans" xmlns:xsi ="http://www.w3.org/2001/XMLSchema-instance" xmlns:p ="http://www.springframework.org/schema/p" xsi:schemaLocation ="http://www.springframework.org/schema/beans http://www.springframework.org/schema/beans/spring-beans.xsd" > <bean class ="com.smart.model.Dog" /> <bean class ="com.smart.model.People" /> <bean class ="com.smart.model.Cat" /> </beans >
在@Configuration配置类中可通过@ImportResource引入XML配置文件,在配置类中即可直接通过@Autowired引用XML配置文件中定义的Bean。
1 2 3 4 5 6 7 8 9 10 11 12 13 14 15 16 17 18 import org.springframework.beans.factory.annotation.Autowired;import org.springframework.context.annotation.Bean;import org.springframework.context.annotation.Configuration;import org.springframework.context.annotation.Import;@Configuration @ImportResource("classpath:beans/beans.xml") public class PeopleConfig @Bean @Autowired public People getPeople1 (Cat cat, Dog dog) People people=new People(); people.setC(cat); people.setD(dog); return people; } }